When I first began my presence online, I had a food blog. Over the years, that has become about fertility as I navigated the journey myself, but in both realms, and for nearly everyone in the wellness space, food is a large part of our content, and having good food photography is a MUST.
And practice makes perfect. Here’s a little bit of my photography journey, as well as my top tips for how to take drool-worthy food photographs.
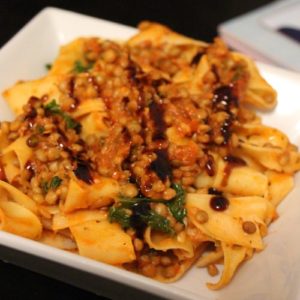
BEFORE
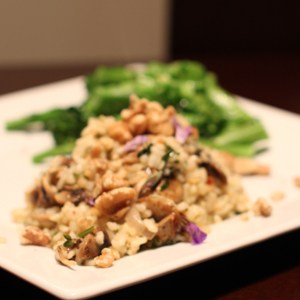
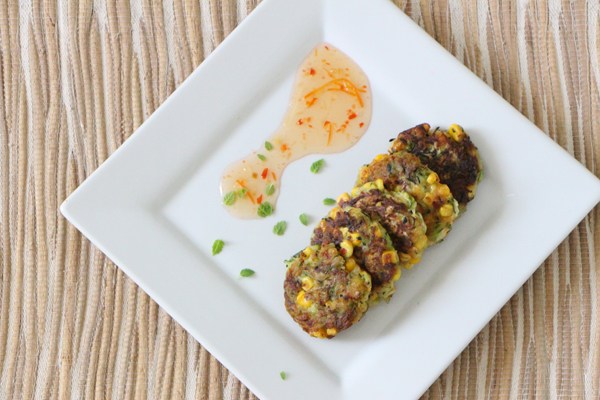
AFTER

TAKE YOUR PHOTOGRAPHS IN NATURAL DAYLIGHT, AND IN A BRIGHT, SUNNY SPOT
This is my number one tip, and one that has literally only sunk in in the last six months (how did it take me this long? I know why, read my next tip). There is no comparison to shooting in natural daylight. Although you can edit photos in Lightroom or Photoshop or many other programs, there is no comparison. My kitchen is dark (and I mean dark!) and the LED lights put awful shadows on food. When you shoot in daylight, the colours come up well (not too yellowy) and the shadows are softer.
My ideal place is in one of my spare bedrooms, where I have the most space and good light. They also have those mirror wardrobes, so the closer I place the dish to them, the less shadow I get (because the mirror bounces the light).
MAKE TIME
The number one reason I wasn’t shooting in daylight was because I didn’t have the time. I’d take photos as I was making the food I was about to eat, which is often at dinnertime, once the sun has gone down, and in my kitchen (you know, the one with the horrible lighting and shadows). I’d snap a few shots of the food as I’d serve it for dinner and then try to eat it before it goes cold. To give you an idea of my daily schedule and why I thought I didn’t have time, I’m up at 5.00am (why did I marry a tradesman?!), housework, bills, get ready, other blah, head to work at 7.30am and return at 5.30pm (although I am probably working a night event, catching up with people or heading out to dinner with my love on 50% of the evenings), then cook dinner, chill for an hour and head to bed at about 9.30pm. There isn’t a lot of sunshine there, so when else was I going to take photos. I’m busy!
Well, I’ve learnt that we’re all busy, and if you have a food blog, then crappy photos aren’t good enough. So, now I only take photographs on the weekend. Sure, I struggle to churn out as many recipes and posts, but, while it has taken me a while to learn, I’ve discovered that I’d prefer quality over quantity.
NEVER, EVER USE FLASH
I don’t have a lot to say about this, except that flash kills photos.
KILL THE SHADOW
Dark and harsh shadows kill photos too, but if you use natural daylight, you won’t have this problem.
GET AN SLR CAMERA WITH A GOOD LENS
My camera was one of the first things I bought after I started the blog. You can take pics on a normal camera or even on your phone (smart phones are pretty rad these days), but SLR cameras give you a better depth of field (this is what makes pictures come to life) and you can also adjust so many things on the camera once you get the hang of it.
I prefer really light and airy shots, so I probably always slightly overexpose them.
They say a good photographer doesn’t need to do much (or any) editing. Truth be told, I rarely edit my photos and probably should more, other than changing the size of them (because uploading them at full size – about 4Mb, will take up 4mB of size on my server). Which brings me to my next point…
UPLOAD PICS AS LARGE AS YOU CAN FIT THEM
When I first started blogging, I used to upload pics at 300 x 300 pixels. I don’t even know why.
You can’t properly see a recipe if it is small.
Then, I thought that 600 pixels wide would be a good option (maybe I thought 600 pixels wide was the size for my blog?).
Then, I was like no, no, no, Robyn, actually find out and post them as large as you can. So I found out my theme is 680 pixels wide. So now my pictures are 680 pixels wide.
Note: I’m not talking about file size! Uploading 4mb photographs will kill your page load time. You want to save your photographs for the web in as high a quality but small a file size that you can manage.
TAKE LOTS OF PICTURES FROM LOTS OF DIFFERENT ANGLES
I always try to take a picture from the top (which usually means placing the dish on the ground) , but then I also take photographs on the angle, and from a variety of angles, and make sure I take a combination of portrait and landscape shots, because different styles work better on different media.
I usually take a total of about 20 – 25 shots per item, and usually toward the end, I can tell which two or three were the best and that I want to use.
I also take some from close up, and some from further away. Take a couple with lots of space around them too, in case you want to add text. You can always crop later.
EXPERIMENT ON MANUAL SETTING
I’m still learning, but I have a basic understanding of the three main elements of photography. The more you play around with these, the more fun photography is. This is my explanation to you:
ISO: this is how sensitive the camera will be to light. A high ISO gives a more noisy/grainy picture, but sometimes a high ISO is necessary when you’re taking a picture in low light (sometimes it isn’t, but that is for another day). Otherwise, you basically want to aim for the lowest ISO possible. Usually on a Canon digital camera, this is 100.
Aperture: this is the size of the opening in the lens when a photo is taken. Basically, the higher the aperture, the more light comes through the camera, and this is measured in F-stops. This, in my opinion though is one of the most important things to get right in food photography though, because a lower F-stop is what gives the photos where the background is blurry, so ideally, you want a low f-stop.
Shutter speed: this is pretty self-explanatory – it is the length of time it takes to take the photo. The longer it takes to take the photo, the more light you can add to it, and this is important for moving shots. Basically when someone is running, you want to take the photo really quickly so you capture all of the movement, so you want a high shutter speed. Generally, there is no movement in food photography, however shutter speed, ISO and aperture all work together, so you have to play around to get it to work.
UNDERSTAND THE RULE OF THIRDS
The rule of thirds is (in my understanding) this. Divide a photo into three, horizontally and vertically. The traditional way of looking at something is in the middle, dead centre, but sometimes it creates interest in the eye, if something is not in the middle third, but centered in one of the thirds on the edge.
UNDERSTAND LEADING LINES
This is where you have a line in something, and it leads the eye toward it. Leading lines are used a lot in graphic design too.